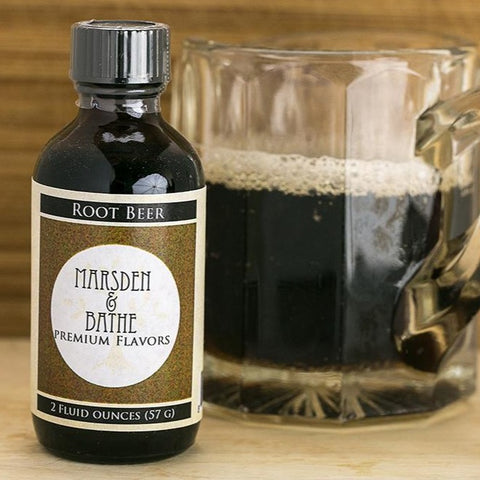
Marsden & Bathe Root Beer Flavor 2 oz
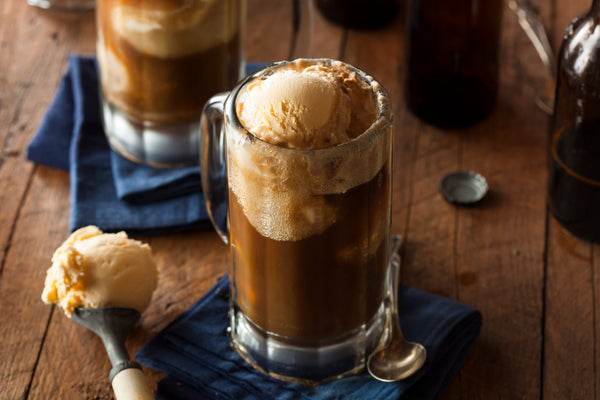
 (See how to make Bubba's root beer and root beer popcorn)

We tried several flavors and this was the root beer flavor we liked best
Use it in candy, candy popcorn, and in a root beer cake. It is excellent in homemade root beer but don't forget to use it in your frostings, cakes, cookies, and candy making.
You can depend on this product. This is a professional-grade flavor that is exceptionally bright--a quality flavor. This comes in 2-ounce bottles, twice the size of those sold in the stores. You get a great professional flavor at real savings.

Bubba's Friday Night Root Beer Popcorn
This is how to make your Friday nights more fun. Make some root beer popcorn and you and Bubba should have some great Friday nights. Take it to the ball game or watch movies in the family room.
Ingredients
- 1/2 cup unpopped popcorn kernels
- 1/4 cup (1/2 stick) butter
- 1/4 cup white corn syrup (Karo)
- 1/8 cup water
- 1 cup granulated sugar
- 1/4 teaspoon baking soda
- 3 teaspoons Root Beer flavor
- 1 drop of Americolor Orange food
- coloring gel or equal
Yields 14 cups of candy popcorn. This recipe can also be doubled successfully.
Directions
- Pop the popcorn kernels. Set aside in 2 large bowls.
- Over medium heat, melt the butter in a medium saucepan.
- Add the corn syrup and water. Stir.
- Add the sugar. Make sure not to let any sugar stick to the edges of the pan. If one grain of sugar is left undissolved, it can cause the whole batch to crystallize.
- Bring to a boil and continue to cook it until the mixture reaches 235-245°F. (Please use a candy thermometer). It is important for the mixture to reach this temperature, if it doesn't, the candy will not harden properly.
- Add the baking soda and stir quickly as the mixture begins to bubble. Once bubbly and frothy, remove the pan from heat.
- Add the flavor and food coloring and mix it in.
- Pour over the popped popcorn in both bowls. Fold into the popcorn until evenly coated.

Bubba's Own Celebratin' Root Beer
Carbonating your beverages is easy. Just add one to two pounds of dry ice for every one gallon of beverage. We’ll give you the details (and important cautions) below.
To carbonate your beverage, place the dry directly into the beverage. It is better if the dry ice is broken into several pieces; we use a meat hammer. Lightly cover your container with a lid or cover that can be easily pushed off by any pressure building in your vessel. (We use an Igloo brand 5-gallon beverage container with a push-on/off lid and push the lid only partway down). Allow the dry ice to dissolve to carbonate your beverage.
Tips
- You may need to stir your beverage two or three times during carbonation. Blocks of dry ice may freeze to the bottom of the container.
- The beverage may freeze around a single block of dry ice and greatly slow carbonation. It is better to have several smaller pieces of dry ice in the beverage.
- Once carbonation is nearly complete and the dry ice dissolved, tightly close your container to retain carbonation. If your container is nearly full and with a tight lid, your beverage will remain carbonated overnight.
- You can add more dry ice to increase carbonation.
- Carbonation may make your drink taste more lemony. If your drink is too strong, add water.
Important Precautions for Carbonating Your Drinks
Dry ice produces carbon dioxide that will carbonate your beverage. It is very simple to do, but some cautions are important:
- Dry ice is extremely cold and will cause burns if it comes in contact with your skin. Always wear gloves or oven mitts when handling dry ice.
- Never allow children to be unattended around the dry ice.
- Never put dry ice in a tightly enclosed container. Dry ice goes directly from a solid to a gas. In so doing, it expands, creates pressure in a closed container, and may explode. The container must be vented or fitted with a loose lid that will pop up under pressure.
- Never use dry ice in a closed room without ventilation. The carbon dioxide can displace oxygen in the room. If you experience shortness of breath, leave the room.
We have a 30-day return policy, which means you have 30 days after receiving your item to request a return.
To be eligible for a return, your item must be in the same condition that you received it, unused, and in its original packaging. You’ll also need the receipt or proof of purchase.
To start a return, you can contact us at customerservice@preparedpantry.com. If your return is accepted, we’ll send you instructions on how and where to send your package. Items sent back to us without first requesting a return will not be accepted.
You can always contact us for any return question at customerservice@preparedpantry.com.
Damages and issues
Please inspect your order upon reception and contact us immediately if the item is defective, damaged or if you receive the wrong item, so that we can evaluate the issue and make it right.
Exceptions / non-returnable items
Certain types of items cannot be returned, like custom products (such as special orders or personalized items). We also do not accept returns for hazardous materials, flammable liquids, or gases. Please get in touch if you have questions or concerns about your specific item.
Unfortunately, we cannot accept returns on sale items or gift cards.
Exchanges
The fastest way to ensure you get what you want is to return the item you have, and once the return is accepted, make a separate purchase for the new item.
Refunds
We will notify you once we’ve received and inspected your return, and let you know if the refund was approved or not. If approved, you’ll be automatically refunded on your original payment method. Please remember it can take some time for your bank or credit card company to process and post the refund too.